Nighttime Landscape Photography. The allure of capturing the perfect nighttime landscape shot is undeniable. The way the stars twinkle in the dark sky, the way city lights illuminate the streets, or the way moonlight casts a serene glow over a landscape – it’s all so captivating. But mastering nighttime landscape photography isn’t just about pointing and shooting; it requires a certain level of skill and technique to truly capture its beauty. In this ultimate guide, we’ll dive into everything you need to know to master the art of nighttime landscape photography and take your skills to the next level. So grab your camera and let’s get started!

Understanding the Basics of Nighttime Landscape Photography
Nighttime landscape photography can be a challenging yet rewarding genre for photographers. To capture stunning images in low light conditions, it’s important to understand the basics of this art form. Firstly, mastering exposure settings is crucial. Shooting in manual mode and adjusting the aperture, shutter speed, and ISO can help you achieve the desired exposure. Secondly, using a tripod is essential to avoid camera shake and ensure sharp images.
Additionally, a remote shutter release or self-timer can further reduce camera shake. Thirdly, finding the right location is key to capturing compelling nighttime landscapes. Look for areas with interesting foreground elements or natural features such as mountains or water bodies. Lastly, patience is key when shooting at night as it takes time to set up and capture the perfect shot. With these basics in mind, you’ll be on your way to mastering nighttime landscape photography.

Essential Gear for Capturing Stunning Nighttime Landscapes
Nighttime landscape photography requires some essential gear that can make a big difference in the quality of your shots. A tripod is an absolute must since you’ll be dealing with long exposures and camera shakes can ruin your image. Consider investing in a sturdy, lightweight tripod to ensure stability during shooting. A remote shutter release or intervalometer is another important accessory as it allows for hands-free operation and eliminates any movement caused by manually pressing the shutter button.
You’ll also want to have a fast wide-angle lens that can capture plenty of light, such as an f/2.8 or faster lens, which will give you more flexibility when choosing exposure settings. Lastly, carrying extra batteries and memory cards is always good practice as nighttime photography tends to drain battery life quickly, and having additional storage space ensures you won’t miss any opportunities for perfect shots!
Tips for Finding the Perfect Location for Nighttime Landscape Photography
Nighttime landscape photography requires more than just a beautiful scene. You need to find a location that offers interesting foreground elements, a clear view of the sky, and minimal light pollution. One way to scout for locations is to use apps like PhotoPills or The Photographer’s Ephemeris, which help you plan your shoot by showing you the position of the moon and stars at any given time.
Additionally, researching your location beforehand can help you identify potential spots for shooting. Look for landmarks or natural features that could add interest to your composition. When scouting at night, bring a flashlight or headlamp to help you navigate and see potential compositions. Remember to always prioritize safety when shooting in remote or unfamiliar locations.
Mastering Exposure Settings for Nighttime Landscape Photography
Understanding the Exposure Triangle: A Key Element in Mastering Nighttime Photography
To master nighttime landscape photography, understanding the exposure triangle is crucial. The exposure triangle consists of three elements: aperture, shutter speed, and ISO. Aperture controls the depth of field or how much light enters the lens; shutter speed determines how long the camera’s sensor is exposed to light; and ISO adjusts the camera’s sensitivity to light.
To capture stunning nighttime landscapes, set your aperture as wide as possible (typically f/2.8 or wider), choose a slow shutter speed (around 20-30 seconds) for capturing starry skies or faster speeds for cityscapes with lights, and adjust the ISO accordingly based on lighting conditions (usually between 800-3200). Balancing these three settings will ensure proper exposure while creating beautifully lit images that highlight natural or man-made features in low-light environments.
Tips and Tricks to Perfect Your Nighttime Landscape Photography with Correct Exposure Settings
To capture stunning nighttime landscape photographs, getting your exposure settings right is crucial. Start by setting your camera to manual mode and choosing a wide aperture (f/2.8 or wider) to let in more light. Adjust the shutter speed according to the available light and adjust ISO as needed to balance exposure without introducing too much digital noise.
Bracketing can also be helpful in ensuring you have several shots of varying exposures to choose from in post-processing. Also, consider using a tripod and remote trigger to avoid camera shaking during longer exposures at night. With these tips and tricks, you’ll be on your way to perfecting your nighttime landscape photography with the correct exposure settings!
The Ultimate Guide to Shooting Starry Nights and Milky Way Using Proper Camera Settings
When it comes to nighttime landscape photography, proper camera settings are crucial to capturing stunning images of starry nights and the Milky Way. Start by using a tripod to keep your camera steady during long exposure times. Use manual focus mode and set your aperture between f/2.8 and f/4 for optimal results in low-light situations.
Adjusting ISO is also important as it controls how sensitive your camera’s sensor is to light – increase this slowly until you achieve the desired brightness in your image. Finally, use a shutter speed between 20-30 seconds depending on the focal length of your lens (long exposures can produce dreamy results). Now that you know these key elements, experiment with different combinations until you find what works best for creating magical nighttime landscapes!
Experimenting with Long Exposures: How to Get Creative Shots of Nighttime Landscapes
Long exposures and creative shots are two essential elements to master when it comes to nighttime landscape photography. To achieve these amazing shots, you need to have a tripod that can keep your camera steady during long exposure times. Next, set your camera’s aperture as wide as possible and lower the ISO setting for cleaner images.
Experiment with different shutter speeds until you find the perfect balance of light and movement in your shot. Adding foreground interest or using star trails can also add a unique element to your photo while emphasizing the beauty of nighttime landscapes. These techniques will help you capture stunning photos that truly showcase the magic of nighttime landscape photography.
Techniques for Creating Compelling Compositions in Nighttime Landscapes
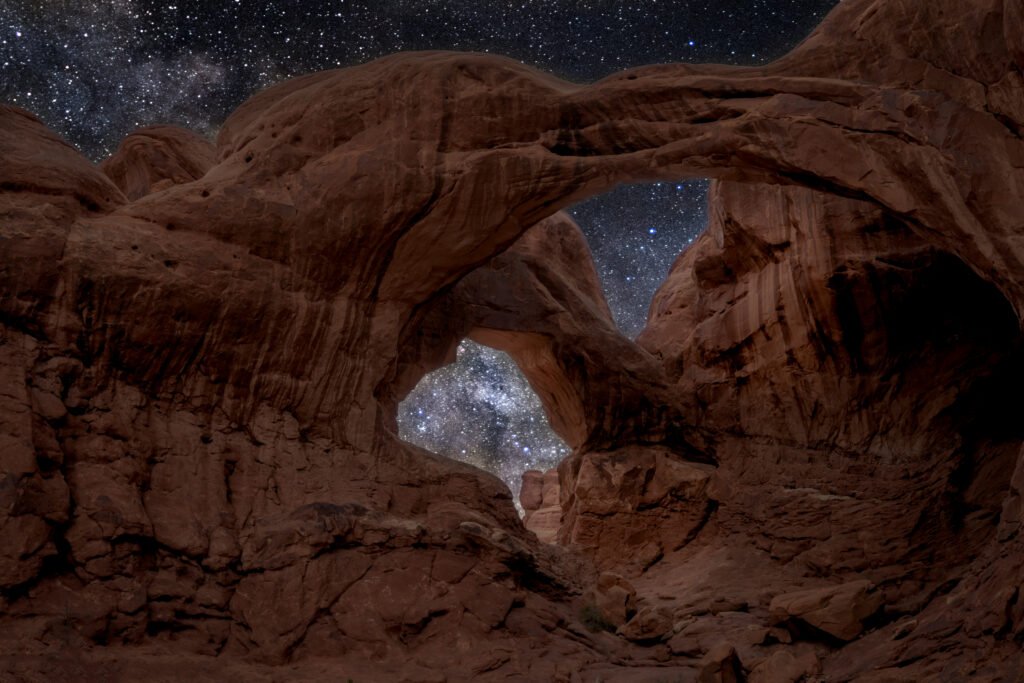
Foreground elements and leading lines are essential in creating compelling compositions in nighttime landscapes. Incorporating a strong foreground adds depth to your image while leading lines draw the viewer’s eye into the photo. Look for interesting objects such as rocks, trees, or water that can serve as foreground elements.
To create leading lines, use natural features such as paths or roads that lead toward the main subject of your photo. Alternatively, you can position yourself at an angle where the stars appear to radiate from a certain point in the sky.
Don’t be afraid to experiment with composition by moving around and trying out different angles. Use your camera’s live view feature to preview how different compositions will look before taking the shot.
Remember that less is often more when it comes to nighttime landscape photography. Focus on capturing one or two key elements rather than trying to cram too much into one photo. This will help create a stronger impact and allow each element of your composition to stand out.

Overcoming Common Challenges in Nighttime Landscape Photography
Dealing with Noise and Other Technical Hurdles in Night Landscape Photography
One of the biggest challenges in nighttime landscape photography is dealing with noise and other technical hurdles. Shooting in low light conditions can result in grainy and noisy images, which can be distracting and take away from the overall impact of the photo. To combat this, it’s important to use a tripod to keep your camera steady and avoid camera shaking.
Additionally, using a lower ISO setting and longer exposure times can help reduce noise. Another option is to shoot multiple exposures and blend them together in post-processing to create a cleaner final image. By taking these steps, you can overcome technical hurdles and capture stunning nighttime landscape photos that truly stand out.
Tips for Balancing Ambient and Artificial Lighting to Create Stunning Composition
When capturing nighttime landscape photography, balancing ambient and artificial lighting can be a challenge. To create stunning compositions, it’s important to find the right balance between these two types of lighting. One tip is to use a low ISO setting and a longer exposure time to capture more ambient light, while also using an external flash or light source to add in artificial lighting where needed.
Another technique is to experiment with the white balance settings on your camera or adjust in post-processing to help balance out different colors of light sources. Properly balancing ambient and artificial lighting will bring your nighttime landscape photos to life!
Overcoming the Challenges of Long Exposure Photography at Night
Long-exposure photography at night is a key technique for capturing stunning nighttime landscape photography. However, it can also present some challenges that you need to overcome. One of the most common issues is camera shake, which can ruin an otherwise sharp and well-exposed image. To combat this, use a sturdy tripod and a remote shutter release or self-timer mode on your camera.
Another challenge is overexposure from too much light entering the lens during long exposures, so use a low ISO setting and adjust your aperture accordingly for proper exposure. By overcoming these challenges, you’ll be able to produce breathtaking nighttime landscape images with ease!
Post-Processing Tips to Enhance Your Nighttime Landscape Photos
Post-processing is an essential step in bringing out the best in your nighttime landscape photos. Noise reduction is a crucial step in post-processing, as high ISO settings can result in grainy images. Use noise reduction software or plugins to smooth out the graininess while retaining image details.
Adjusting the white balance can also greatly improve the look of your nighttime landscape photos. Experiment with different white balance settings to achieve the desired mood and color temperature.
Another useful post-processing technique is dodging and burning****. This involves selectively lightening or darkening specific areas of the image to create depth and dimensionality.
Finally, consider adding a touch of creative editing to your nighttime landscape photos. This could include adding a subtle vignette, boosting contrast, or adjusting saturation levels to enhance the colors in the image.
Remember, post-processing should be used to enhance your photos, not fix mistakes made during shooting. With these tips, you can take your nighttime landscape photography to the next level.

Inspiring Examples of Nighttime Landscape Photography to Fuel Your Creativity
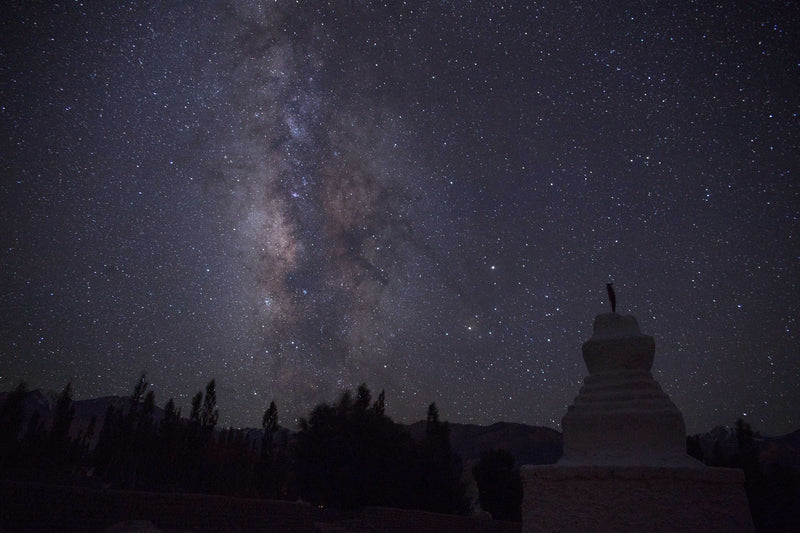
Nighttime landscape photography can produce some of the most stunning and awe-inspiring images. From capturing the Milky Way to the Northern Lights, the possibilities are endless. Looking at examples of other photographers’ work can help inspire your own creativity and give you ideas for your next shoot. One key element to keep in mind is composition. Pay attention to how leading lines, foreground elements, and framing can enhance your image.
Another important factor is exposure. Experiment with different shutter speeds and ISO settings to capture the perfect balance of light and dark. Don’t be afraid to try new techniques, such as light painting or star trails, to add interest to your photos. With practice and patience, you too can create stunning nighttime landscape photos that will leave viewers in awe.
In conclusion, nighttime landscape photography can be a challenging yet rewarding experience for any photographer. By understanding the basics, having the right gear, finding the perfect location, mastering exposure settings, and using creative composition techniques, you can capture stunning nighttime landscapes that will leave your viewers in awe.
Don’t be discouraged by common challenges such as low light and noise – with practice and patience, you can overcome them and produce breathtaking photos. And with post-processing tips to enhance your images and inspiring examples to fuel your creativity, the possibilities are endless. So grab your camera and start exploring the beauty of nighttime landscapes today!
Frequently Asked Questions
Q.Who can benefit from nighttime landscape photography?
A.Anyone who wants to capture stunning, unique photos of nature.
Q.What equipment do I need for nighttime landscape photography?
A.A tripod, camera with manual settings, and a remote shutter release.
Q.How do I get the best results from nighttime landscape photography?
A.Use a wide-angle lens, shoot in raw format, and experiment with settings.
Q.What if I don’t have access to a remote shutter release?
A.Use the camera’s timer function to reduce camera shake from pressing the button.
Q.How can I capture stars in my nighttime landscape photos?
A.Use a long exposure time and a high ISO, and consider stacking multiple shots.
Q.What if I’m afraid of being out alone at night for photography?
A.Bring a friend or join a photography group for safety and camaraderie.


