Capturing Stunning Photography
Capturing Stunning Photography. Photography is an art form that has the power to captivate our hearts and minds. Whether it’s capturing a breathtaking landscape or a candid moment between loved ones, a stunning photograph has the ability to evoke emotions and tell a story in ways that words cannot. But what separates an average photograph from a truly outstanding one? In this blog post, we will be discussing seven essential features that can help you capture stunning photography. Whether you’re a beginner or an experienced photographer, these tips will help you take your skills to the next level and create images that truly stand out. So grab your camera and let’s get started!

The Importance of Capturing the Best Features and Characteristics in Photography
Capturing the Best Features and Characteristics of your subject is crucial in photography. It’s not just about pointing your camera and taking a shot; it’s about finding the right angle, lighting, and composition to bring out the best in your subject. Whether you’re shooting people, animals, or landscapes, understanding the essential features that make them unique is key to capturing stunning photographs. By paying attention to details such as facial expressions, body language, textures, and colors, you can create images that evoke emotion and tell a story. With practice and patience, you can develop an eye for finding the best features and characteristics of any subject and use them to create beautiful photographs that stand out from the rest.

7 Essential Features to Look for When Shooting Stunning Photographs
Finding the best features and characteristics for your subject in photography is crucial to create stunning photographs that truly capture their essence. Here are 7 essential features to look for when shooting beautiful photos:
- *Emotion*: The emotions of your subject can convey a lot more than words ever can. Look for expressions, mood, body language and gestures that show how they feel.
- *Personality*: Every person has unique traits and quirks that make them who they are. Try to capture those special qualities in your shots.
- *Eyes*: The eyes are often referred to as the “windows of the soul”. By focusing on the eyes, you can add depth and emotion into your photographs.
- *Hands*: Hands can tell a story by themselves – whether it’s holding an object, gesturing or simply resting somewhere in the frame.
- Location: Choosing interesting locations enhances your photos with character and charm that complements well with its surroundings
- Context: A photograph without context loses much of its meaning; try framing shots carefully so relevant background elements offer structure & meaning
- Movement: Capturing motion adds life & energy into still images – practice using burst mode or adjusting shutter speed accordingly.
By consciously incorporating these features in your photography sessions, you’ll be able to produce captivating images which evoke a variety of emotions from viewers while also doing justice towards the subject involved
How to Find the Best Lighting for Your Photographic Subject
Finding the Best Lighting for Your Photographic Subject
One of the most important aspects of capturing stunning photography is finding the best lighting for your subject. Whether you’re shooting indoors or outdoors, the right lighting can make all the difference in the final image.
When shooting outdoors, consider the time of day and weather conditions. The golden hour – the hour after sunrise and before sunset – provides a warm, soft light that can enhance your subject’s features. Overcast days can also provide great lighting for portraits, as the clouds act as a natural diffuser.
Indoor photography can be more challenging, but there are ways to make it work. Natural light from windows or doors can provide a soft, flattering light for portraits. If natural light isn’t available, consider using artificial lighting such as lamps or studio lights to create a similar effect.
Ultimately, finding the best lighting for your subject requires experimentation and practice. Don’t be afraid to try different lighting setups and see what works best for your specific situation.

Composition Techniques: Finding Balance and Symmetry in Your Shots
Composition techniques are crucial for achieving stunning and captivating photographs. Finding balance and symmetry will draw the viewer’s eye to your subject, creating a pleasing visual experience. One of the most important composition rules is the “rule of thirds,” where you divide your frame into three equal parts both horizontally and vertically. Positioning your subject at one of these intersections or along one of the lines creates a more dynamic image.
Another key aspect is leading lines**. These can be used to guide the viewer’s gaze towards your subject or across the entire photo, adding depth and dimensionality to your shots.
In addition, consider foreground/background*: including interesting elements in both areas will create layers within your photos that add interest and complexity. Finally, don’t forget about *negative space, which can help highlight smaller subjects by providing contrast against an open background.

Understanding Aperture, Shutter Speed, and ISO – A Guide to Perfect Exposure
The Relationship Between Aperture, Shutter Speed and ISO
The Relationship Between Aperture, Shutter Speed and ISO: Understanding how aperture, shutter speed, and ISO work together is crucial in achieving perfect exposure. Aperture controls the amount of light that enters the camera, while shutter speed determines how long the sensor is exposed to light. ISO, on the other hand, measures the camera’s sensitivity to light. A wider aperture allows more light to enter the camera, but also results in a shallower depth of field. A slower shutter speed lets in more light but can result in motion blur. Increasing ISO can help in low-light situations but can also introduce noise into the image. Balancing these three elements is key to capturing stunning photographs with perfect exposure.
Understanding the Importance of Proper Exposure in Photography
Proper exposure is one of the most crucial aspects of capturing stunning photographs. It refers to the balance between aperture, shutter speed, and ISO that allows you to achieve the perfect brightness and contrast in your images. Without proper exposure, your photos may appear too dark or too bright, resulting in loss of detail and clarity. Understanding how to adjust these settings according to different lighting conditions and subjects can make a significant difference in the quality of your photos. With proper exposure, you can create a more dynamic and visually appealing image that accurately represents your subject’s best features and characteristics.
Mastering Manual Mode: Tips for Adjusting Aperture, Shutter Speed and ISO
To achieve perfect exposure in your photographs, it’s essential to master the three key pillars of photography – aperture, shutter speed, and ISO. These three settings work together to control the amount of light entering your camera lens and hitting the sensor.
Adjusting aperture will determine how much light enters your camera while also controlling depth of field. A lower f-stop means a wider aperture (more light) but less depth of field. Conversely, higher f-stops mean less light but more depth.
Shutter speed controls how long your camera’s sensor is exposed to that incoming light. A slower shutter speed lets in more light but increases motion blur while faster speeds freeze action but potentially darken the image.
ISO determines how sensitive the camera’s sensor is to that incoming light with higher ISO numbers capturing more detail in low-light situations at the expense of increased noise or graininess in photos.
By adjusting these three elements creatively you can create stunning images that capture all relevant features and characteristics about your subject matter.
Overcoming Common Challenges with Exposure in Photography
Achieving perfect exposure can be challenging, especially when dealing with difficult lighting situations. One common challenge is dealing with high contrast scenes, where the subject is either too bright or too dark. To overcome this, adjust your camera’s exposure compensation to either increase or decrease the exposure. Another challenge is shooting in low light conditions, which can result in blurry or noisy images. To combat this, use a wider aperture and slower shutter speed, or increase your camera’s ISO sensitivity. Remember to balance these settings to avoid overexposure or underexposure. With practice and experimentation, you can master the art of exposure and capture stunning photographs every time.
The Benefits of Shooting RAW for Better Image Quality
Shooting RAW is a popular technique among professional photographers as it allows for greater flexibility in post-processing. Unlike JPEG, RAW files contain all the data captured by the camera’s sensor, providing more control over exposure, color, and detail. While shooting in RAW requires more storage space and time for editing, the benefits are worth it for those seeking the highest quality images. One of the main advantages of shooting RAW is the ability to recover blown highlights or dark shadows that may have been lost in a JPEG file. Additionally, RAW files offer a wider color gamut and greater dynamic range, allowing for more accurate and vibrant colors. When shooting in RAW, it’s important to adjust white balance and exposure settings carefully to avoid overexposure or underexposure. With some practice and experimentation, shooting RAW can greatly enhance the quality of your photographs.
Using Manual Focus to Capture Sharp Details in Your Photos
Using Manual Focus is a great way to ensure that you capture sharp details in your photos. While autofocus can be convenient, it doesn’t always work as well as we’d like it to. When shooting portraits, for example, autofocus may focus on the wrong part of the subject’s face, resulting in a blurry image. By using manual focus, you have complete control over what part of the image is in focus.
To use manual focus, switch your lens to manual mode and adjust the focus ring until your subject is sharp. It may take some practice to get used to using manual focus, but once you do, you’ll find that it gives you much more control over your images. Additionally, using a tripod can help ensure that your camera stays steady while you adjust the focus ring, resulting in even sharper images.

Top Tips for Post-Processing: Enhancing Colors and Adjusting Contrast
When it comes to post-processing your photos, there are a few key tips to keep in mind. Enhancing colors can really make your images pop, but be careful not to overdo it and end up with an unrealistic look. Adjusting contrast can also help bring out details and create a more dynamic image. One important thing to remember is to edit on a calibrated monitor so that the colors you see on your screen match the final output. Another tip is to use non-destructive editing techniques, such as adjustment layers or virtual copies, so that you can always go back and make changes later if needed. Finally, don’t be afraid to experiment with different editing styles and techniques until you find what works best for your particular style and subject matter.
Taking Advantage of Natural Elements – Incorporating Water, Sky or Landscapes into your pictures.
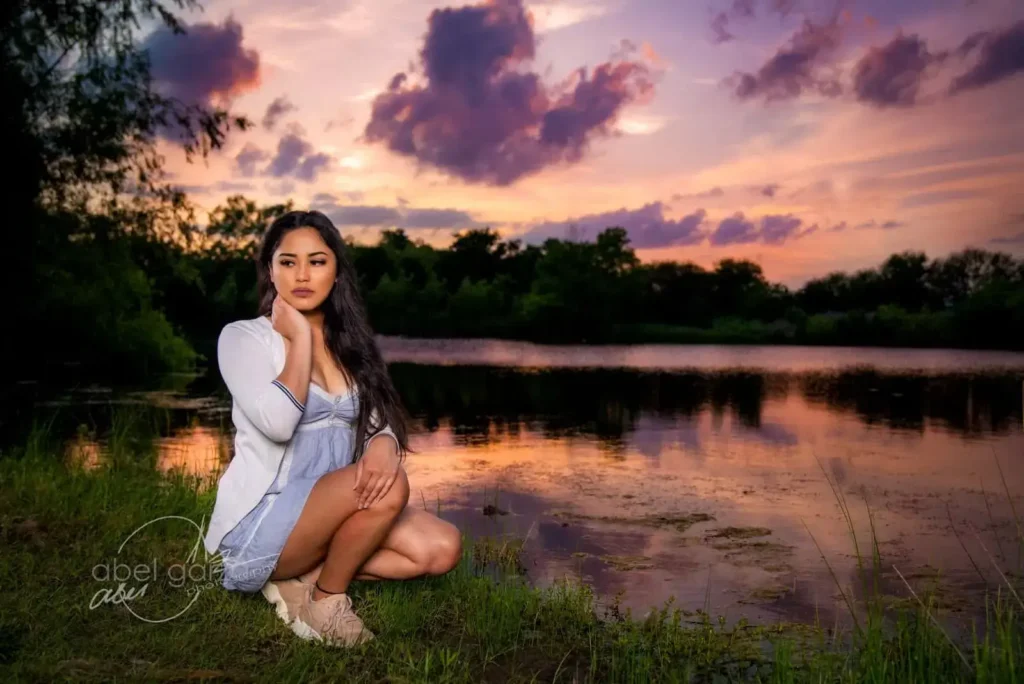
When taking photographs, it’s essential to consider the natural elements around you. Incorporating water into your shots can add an element of tranquility and calmness. Look for reflections in lakes or rivers, or capture waves crashing against rocks at the beach. The sky is also a crucial component of nature photography that shouldn’t be overlooked; dramatic clouds, colorful sunsets, and sunrises can add depth and interest to an image. When capturing landscapes or cityscapes, make sure to include foreground subjects such as trees or buildings to create depth in your shot. Using natural elements correctly can make all the difference when creating stunning images. Don’t be afraid to experiment and play with different angles and perspectives to find what works best for you!
Choosing the Right Camera Settings According To Different Scenarios
When it comes to photography, understanding how to change your camera settings correctly can make a big difference when shooting different scenarios. Firstly, consider the amount of light available and set your ISO accordingly. For bright outdoor scenes, use a low ISO to avoid over-exposure while for indoor or dim lighting conditions, increase this setting for better image quality.
Next up is shutter speed, which determines how long the camera’s sensor is exposed to light. Use fast shutter speeds for action shots such as sports or wildlife photography and slow shutter speeds for capturing motion blur in artistic shots like waterfalls or cityscapes at night.
Lastly, don’t forget about choosing the right aperture value – this controls depth-of-field and affects focus on the subject versus background elements. A wider aperture creates a shallow depth of field that blurs out unwanted backgrounds while smaller apertures work best when you want both foreground and background elements in focus.
Understanding these basic principles will help you choose appropriate camera settings that achieve successful results when photographing various subjects and scenarios.
In conclusion, capturing stunning photography requires more than just a good camera. It involves finding the best features and characteristics of your subject, understanding the technical aspects of photography, and utilizing various techniques to enhance your shots. By following the essential features outlined in this article, you can take your photography skills to the next level and capture breathtaking images that truly stand out. Remember to experiment with different lighting, composition, and camera settings to find what works best for you. With practice and dedication, you can become a master at capturing stunning photography.
Questions
Who can benefit from finding the best features in photography?
Anyone who wants to capture stunning photos and improve their skills.
What are some important characteristics to consider in photography?
Lighting, composition, subject, and background are key factors.
How can you identify the best features of your subject in photography?
Observe and experiment with different angles, lighting and compositions.
What if my subject doesn’t have any standout features or characteristics?
Try different techniques such as creative framing or using props to add interest.
How can I improve my photography skills?
Practice regularly, study the works of other photographers, and seek feedback.
What are some common mistakes to avoid when trying to find the best features in photography?
Overcomplicating the shot, neglecting the background, and forgetting to adjust settings.


