Master the Art of Photographing Stars
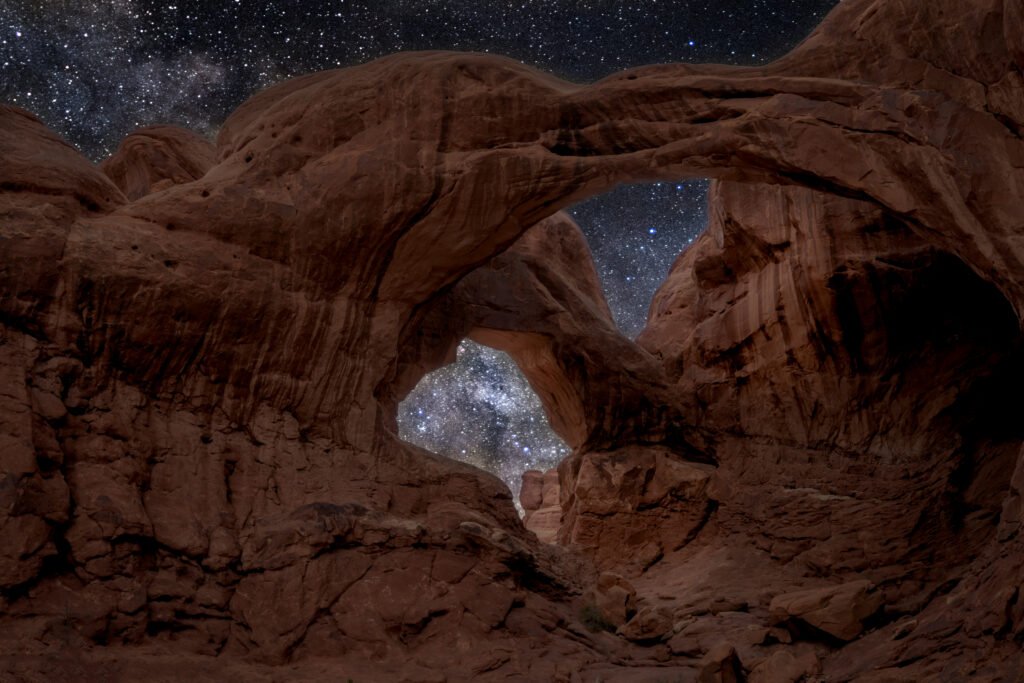
Master the Art of Photographing Stars. Have you ever gazed up at the night sky, mesmerized by the twinkling stars, and wished you could capture their beauty in a photograph? Well, now you can! Photographing stars may seem daunting, but with the right knowledge and techniques, it can be an incredibly rewarding experience. In this comprehensive guide, we’ll take you on a journey through the art of photographing stars, from selecting the right equipment to mastering exposure settings. Get ready to take your astrophotography skills to new heights!
Understanding the Basics of Photographing Stars
Photographing stars can be challenging but rewarding. Before diving into the technical details, it’s important to understand some basics. The night sky is not uniform in brightness and there are various factors that affect how visible the stars will be. Light pollution from nearby cities or even moonlight can make it difficult to capture clear images of the stars. Understanding how different types of cameras work and their capabilities when shooting in low light conditions is crucial.
Additionally, knowing about star movement is essential for capturing clear shots of stars without any motion blur. Stars move across the sky due to Earth’s rotation, which means longer exposure times might result in blurry images. One way to overcome this challenge is by using a tracking mount or stacking multiple shorter exposures together with specialized software.
In short, mastering basic concepts such as understanding night sky brightness variations and star movements will lay the foundation for capturing stunning photos of stars at night.

Essential Equipment for Capturing Stunning Starry Skies
When it comes to photographing stars, having the right equipment is crucial. A sturdy tripod is a must-have since you will be taking long exposures, and any movement can ruin your shot. It’s also important to use a wide-angle lens, ideally with an aperture of f/2.8 or wider, as this will allow more light into the camera and make your stars appear brighter.
Additionally, consider investing in a remote shutter release or intervalometer to minimize camera shake when pressing the shutter button. A red flashlight can also be useful for adjusting settings without ruining your night vision.
If you’re planning on venturing out into dark areas, bring plenty of spare batteries and memory cards so that you don’t run out of power or storage mid-shoot. And always dress warmly since nighttime temperatures can drop significantly even during summer months.
By using the right equipment and ensuring that everything is in working order before you head out to shoot, you’ll set yourself up for success when capturing stunning photographs of our galaxy’s twinkling stars.

Tips and Techniques for Finding the Best Locations to Photograph Stars
Finding the perfect location for photographing stars is crucial to capturing stunning images. The ideal places are those with clear, dark skies and minimal light pollution. Research potential locations using apps such as Dark Sky Finder or Stellarium, which provide information on light pollution levels and celestial events. Consider factors such as elevation, distance from cities, and weather conditions when choosing a spot.
Once you arrive at your preferred location for star photography, scout out specific vantage points that offer interesting foreground elements to include in your composition. Look for natural formations like trees or mountains, or man-made structures such as buildings or bridges.
It’s important to be patient when waiting for the right circumstances to shoot stars – this may require arriving early in the evening and staying late into the night. Remember to bring along warm clothes and snacks so you can stay comfortable during long shoots.
Preparing well in advance will help make sure you achieve optimal results when shooting stars – don’t leave anything up to chance!
Mastering Exposure Settings for Perfect Star Photography
Mastering exposure settings is crucial to capturing stunning star photography. One of the most important settings to consider is the shutter speed. A longer shutter speed allows more light to enter the camera, resulting in brighter stars and a more detailed sky. However, a longer shutter speed also increases the risk of motion blur if the camera or subject moves during the exposure. To avoid this, use a tripod and a remote shutter release to keep the camera steady.
Another important setting is ISO, which determines the camera’s sensitivity to light. A higher ISO can capture more stars in low-light conditions, but it also increases digital noise in the image. It’s best to start with a lower ISO and gradually increase it until you achieve your desired level of brightness without too much noise.
Lastly, consider using a wide aperture (low f-stop number) to allow more light into the camera and create a shallow depth of field, which can make stars appear sharper and more defined. Experiment with different combinations of these settings to find what works best for your specific location and lighting conditions.

Post-Processing Tips to Enhance Your Starry Night Images
Once you have captured your starry night images, it’s time to enhance them through post-processing. Adobe Lightroom and Photoshop are two popular software options for editing astrophotography.
First, adjust the white balance to remove any unwanted color casts. Then, increase the exposure and contrast to bring out the stars. Use the clarity slider to add definition to the stars and reduce noise with the noise reduction tool.
Next, consider adding a graduated filter or adjusting the curves to create a more dramatic sky. You can also experiment with different color adjustments to create a unique look.
When working with multiple images for a star trail or time-lapse, use software like StarStax or LRTimelapse to stack and blend your images seamlessly.
Remember, post-processing should enhance your image without making it look unrealistic. Keep it subtle and let the natural beauty of the stars shine through.
Troubleshooting Common Issues in Photographing Stars
Common Issues in Photographing Stars
Photographing stars can come with its own set of challenges. One common issue is light pollution, which can interfere with the clarity of your starry sky images. To avoid this problem, try finding a location far away from city lights or use special filters to block out unwanted light.
Another issue you might encounter is camera shake or motion blur due to long exposure times. Investing in a sturdy tripod and using a remote shutter release can help minimize these problems.
Additionally, cold weather conditions can also cause issues such as fogging on your lens. Keep your gear warm by storing it in an insulated bag before heading outdoors and consider bringing backup batteries since cold temperatures drain battery life faster than usual.
Lastly, taking multiple shots within the same area over time without adjusting focus could result in blurry images when stacked together during post-processing. Make sure to refocus between each shot or use an autofocus feature that tracks celestial objects as they move across the sky for sharper results.
By anticipating and addressing these common issues ahead of time, you’ll be well on your way to capturing breathtaking photos of the stars above.
In conclusion, photographing stars can be an incredibly rewarding experience for photographers of all levels. By understanding the basics, investing in essential equipment, and utilizing tips and techniques for location scouting and exposure settings, you’ll be able to capture stunning images of the night sky. Additionally, post-processing techniques can enhance your photos even further. Don’t let common issues like camera shake or noise discourage you – with some troubleshooting skills under your belt, you’ll be capturing breathtaking starry skies in no time. So grab your gear and head out into the darkness to hone your skills as a star photographer!
Answers
Who can benefit from photographing stars?
Anyone who enjoys stargazing and wants to capture the beauty of the night sky.
What equipment do I need for photographing stars?
A camera with manual settings, a tripod, and a lens with a wide aperture.
How do I find the best location for photographing stars?
Look for dark sky areas away from city lights, and check weather conditions beforehand.
What if I don’t have a camera with manual settings?
You can still capture stars with a smartphone app like NightCap or SkyView.
How do I adjust my camera settings for photographing stars?
Use a high ISO, a wide aperture, and a long shutter speed for optimal results.
What if I’m not getting the results I want?
Experiment with different settings and try again on a different night or location. Patience is key.


